Running your production
Auditions
Set up sessions, take public sign-ups, run the door, and record casting.
The Auditions area is where you set up sessions, take public sign-ups, run the door on the day, and record who gets each part.
You will find it under Production in the menu on the left. It has four tabs: Sessions, Run Sheet, Casting and Signup Form.
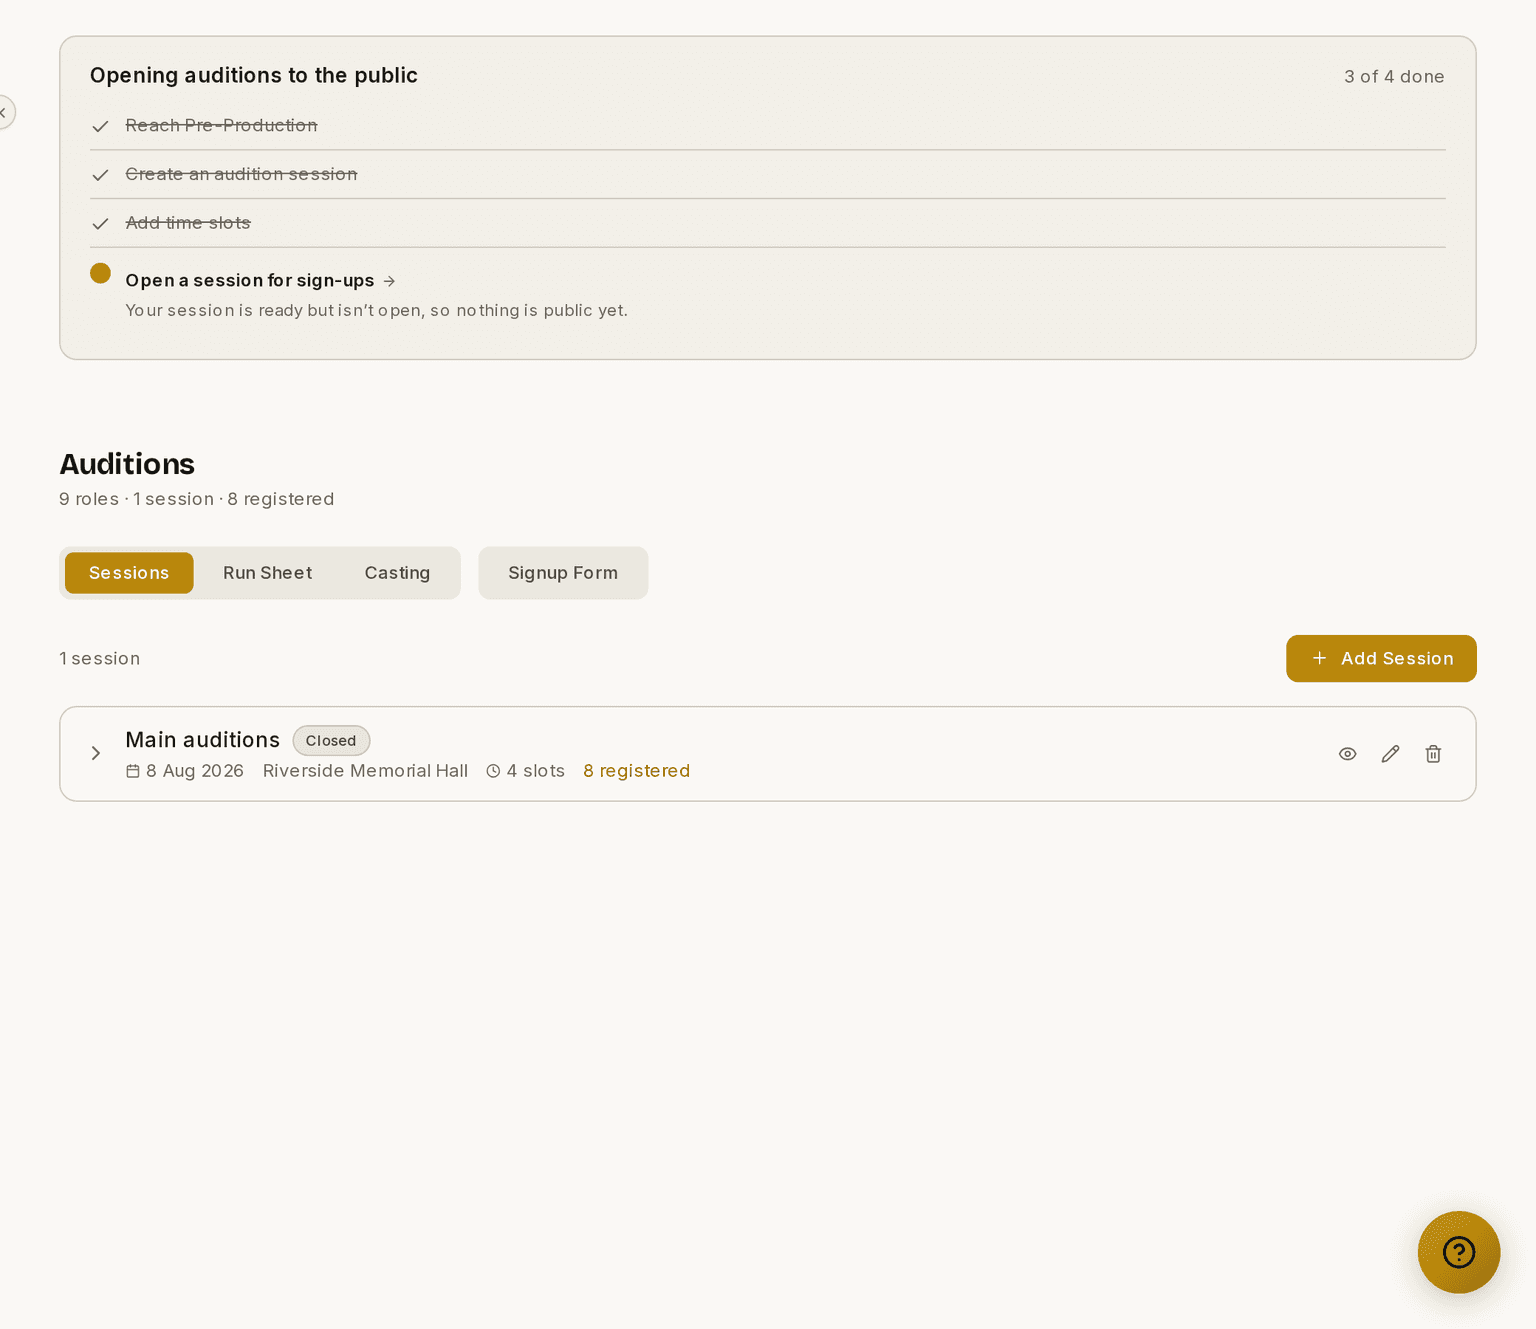
Screenshots show the light theme. The app looks the same in dark. The public sign-up page has its own dark styling, which is not a theme setting.
The checklist at the top — Opening auditions to the public — tracks the four things that have to be true before anybody can sign up. It tells you which one to do next, so you do not have to work it out.
How to create an audition session
- Open Auditions ▸ Sessions.
- Click Add Session, at the top right.

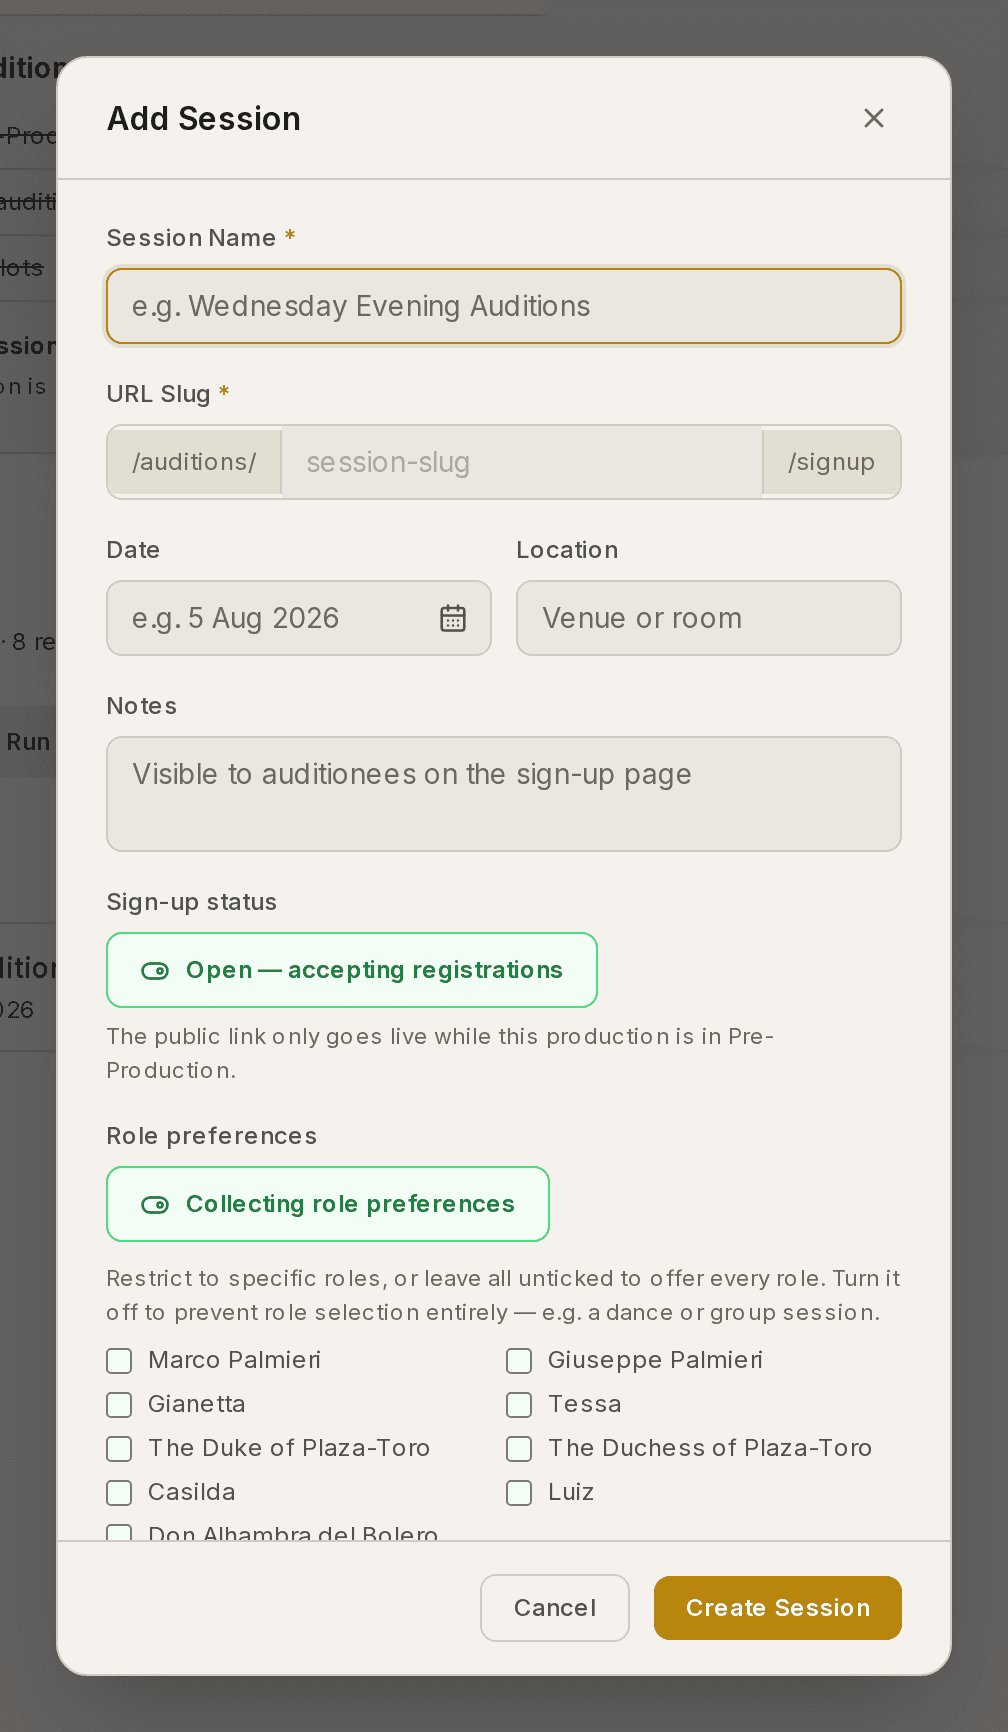
- Fill in the session. Session Name and URL Slug are both required — the slug is the part that appears in your public link, so keep it short.
- Add a Date, a Location and any Notes for the people auditioning.
- Set Sign-up status. Leave it open if you are ready to take bookings.
- Choose whether the session collects role preferences, and tick specific roles if you want to restrict it.
- Click Create Session.
How to add time slots
⚠ Time slots are not in the Add Session dialog. You generate them on the session itself, after you have created it. Every sign-up has to land in a slot, so a session with no slots cannot take bookings.
- Open Auditions ▸ Sessions.
- Click the arrow at the left of your session to expand it.
- Click Generate Slots.
- Enter a Start Time and an End Time — the window you are auditioning across.
- Set Duration (min) for each slot, and Max registrants per slot.
- Click Generate.
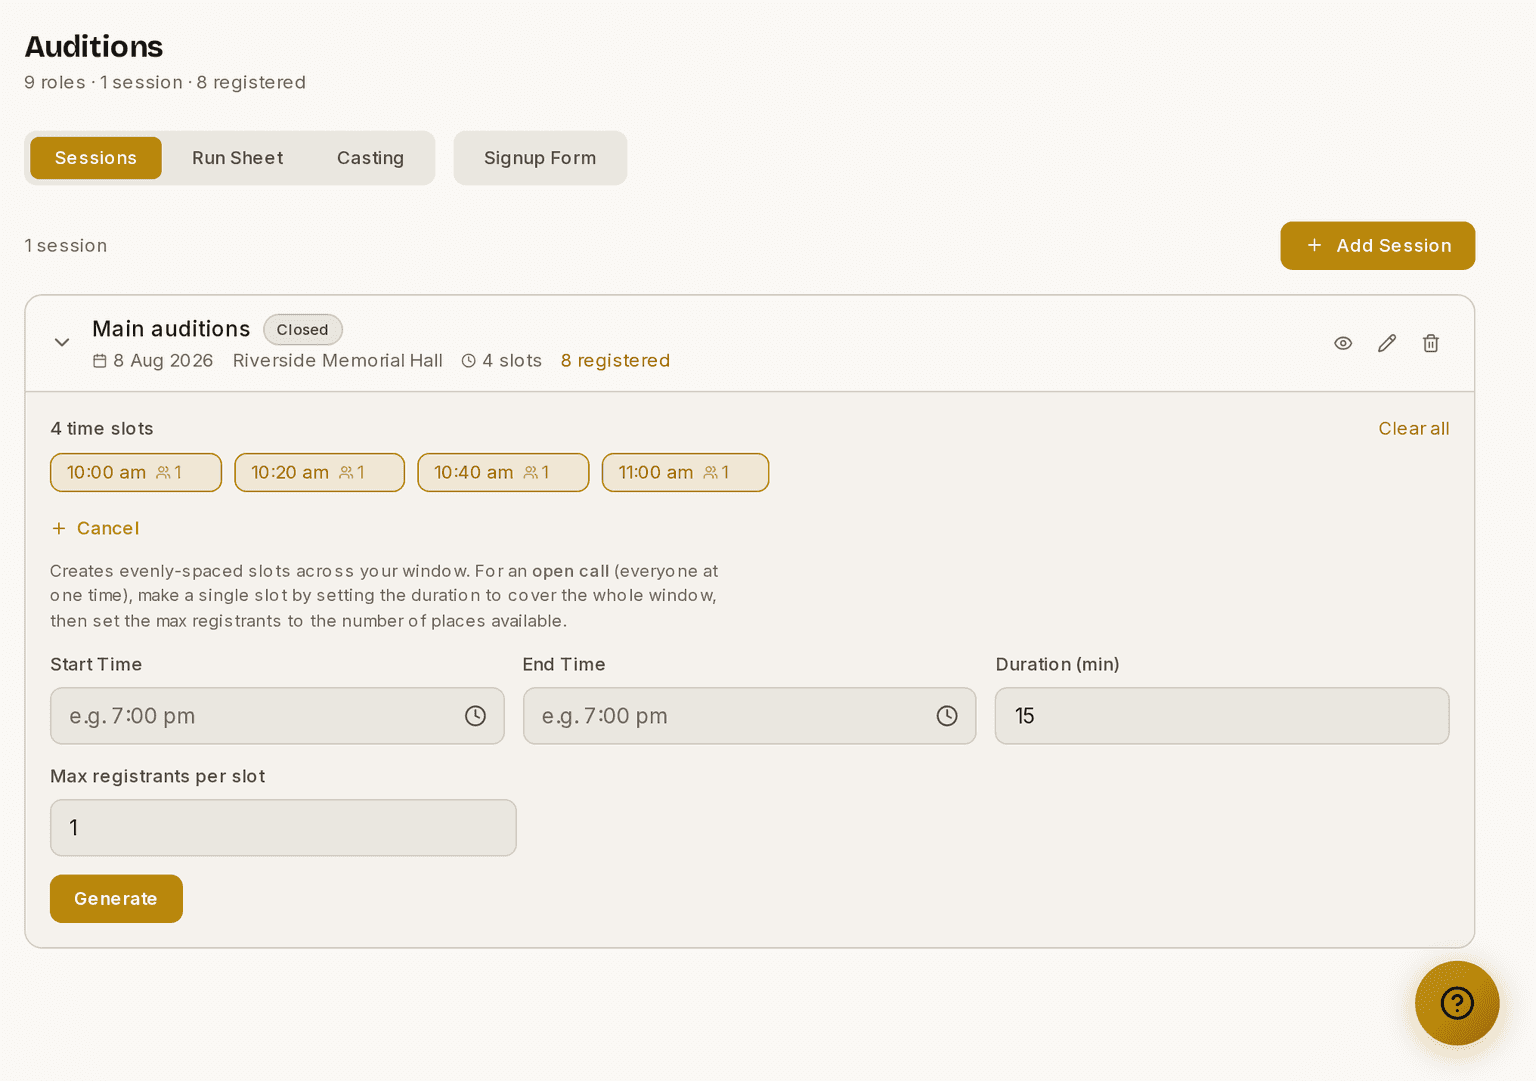
Prompter creates evenly-spaced slots across your window. They appear as chips on the session, and Clear all removes them if you want to start again.
Running an open call, where everybody turns up at once? Make a single slot: set the duration to cover the whole window, then set Max registrants per slot to the number of places you have. There is no separate open-call mode.
Role preferences
Each session decides whether it collects role preferences.
- Leave this on for a normal audition.
- Turn it off for a dance call or a group call, where nobody reads for a specific part.
You can also limit a session to certain roles, which suits a leads-only call. The roles themselves come from your show's characters, on the Show page. There is no separate roles list in Auditions.
How to share your sign-up link
Each production has one stable link: [your-web-address].get-prompter.app/auditions/<your-show>
- Open Auditions ▸ Signup Form.
- Click Copy beside the public link.
- Send it out, or put it on your social media.
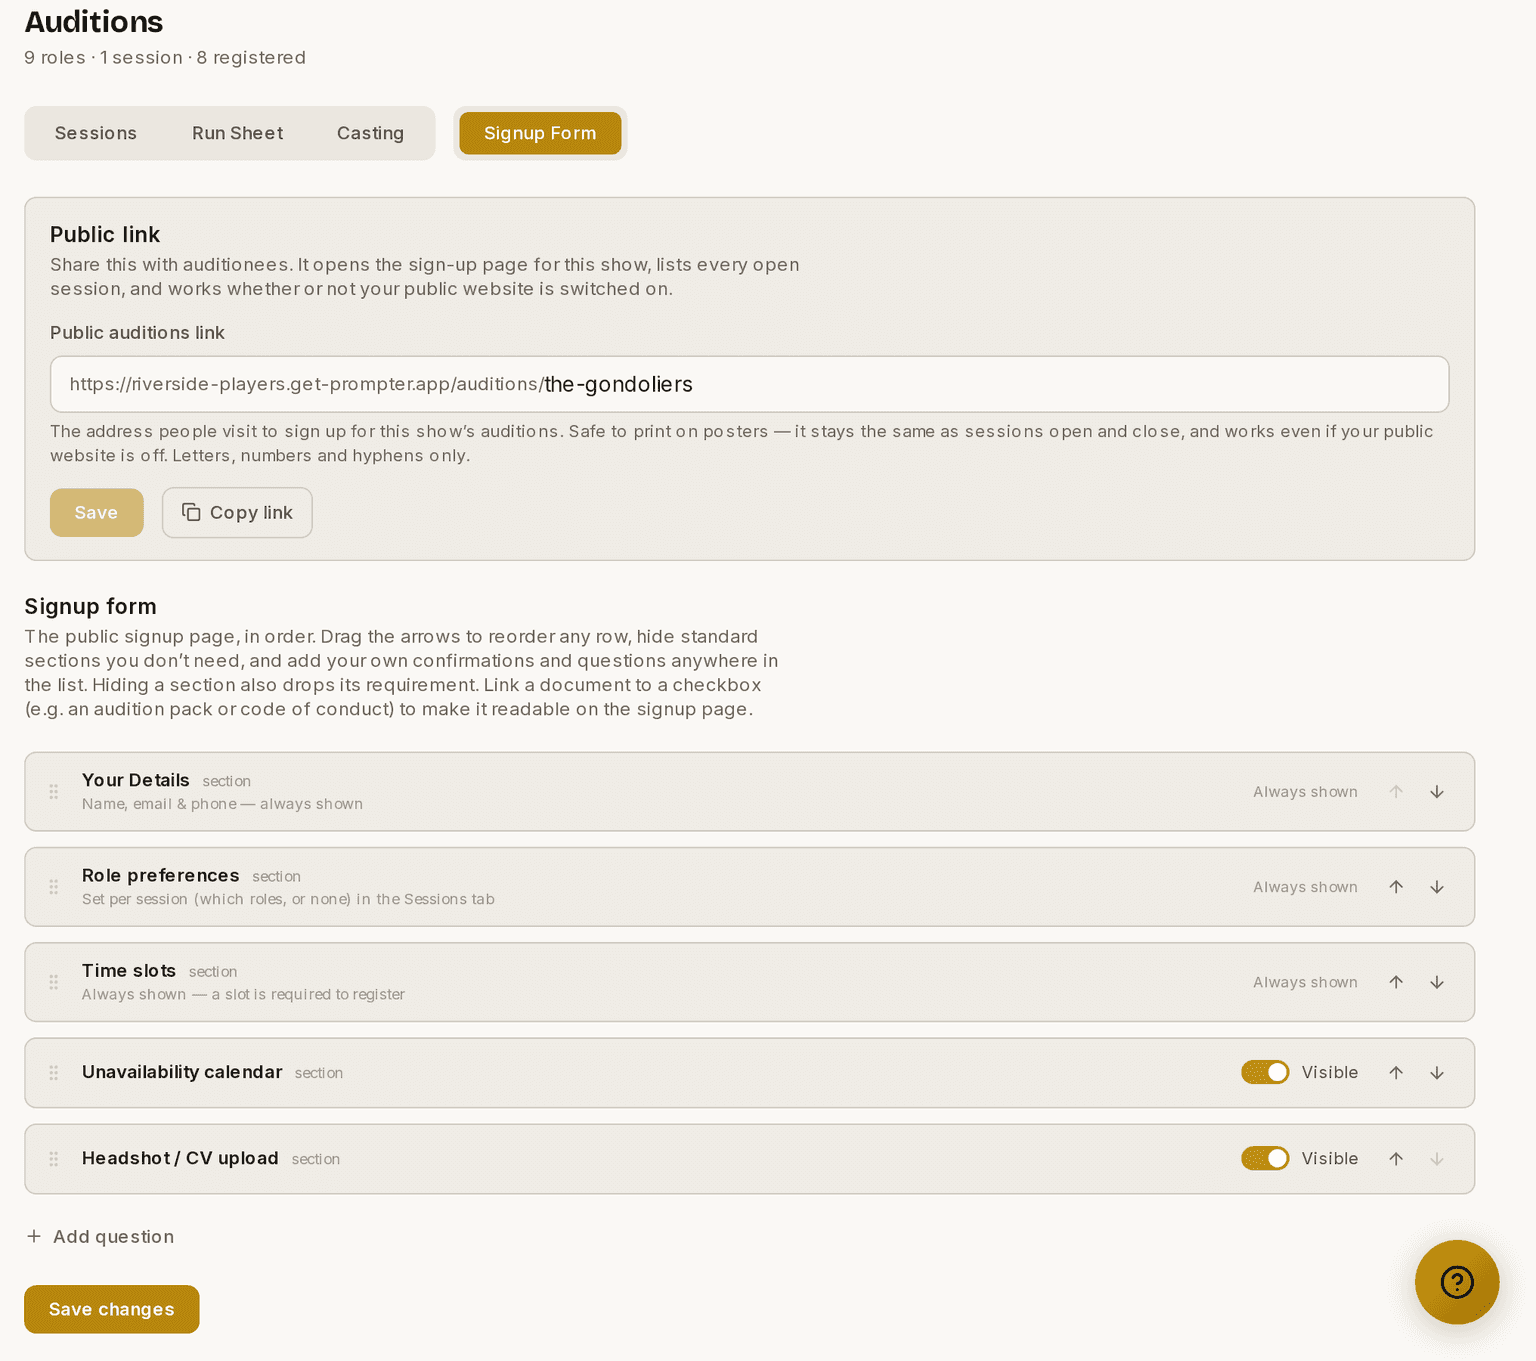
The link needs no login. It lists every open session. It works even if your public website is switched off.
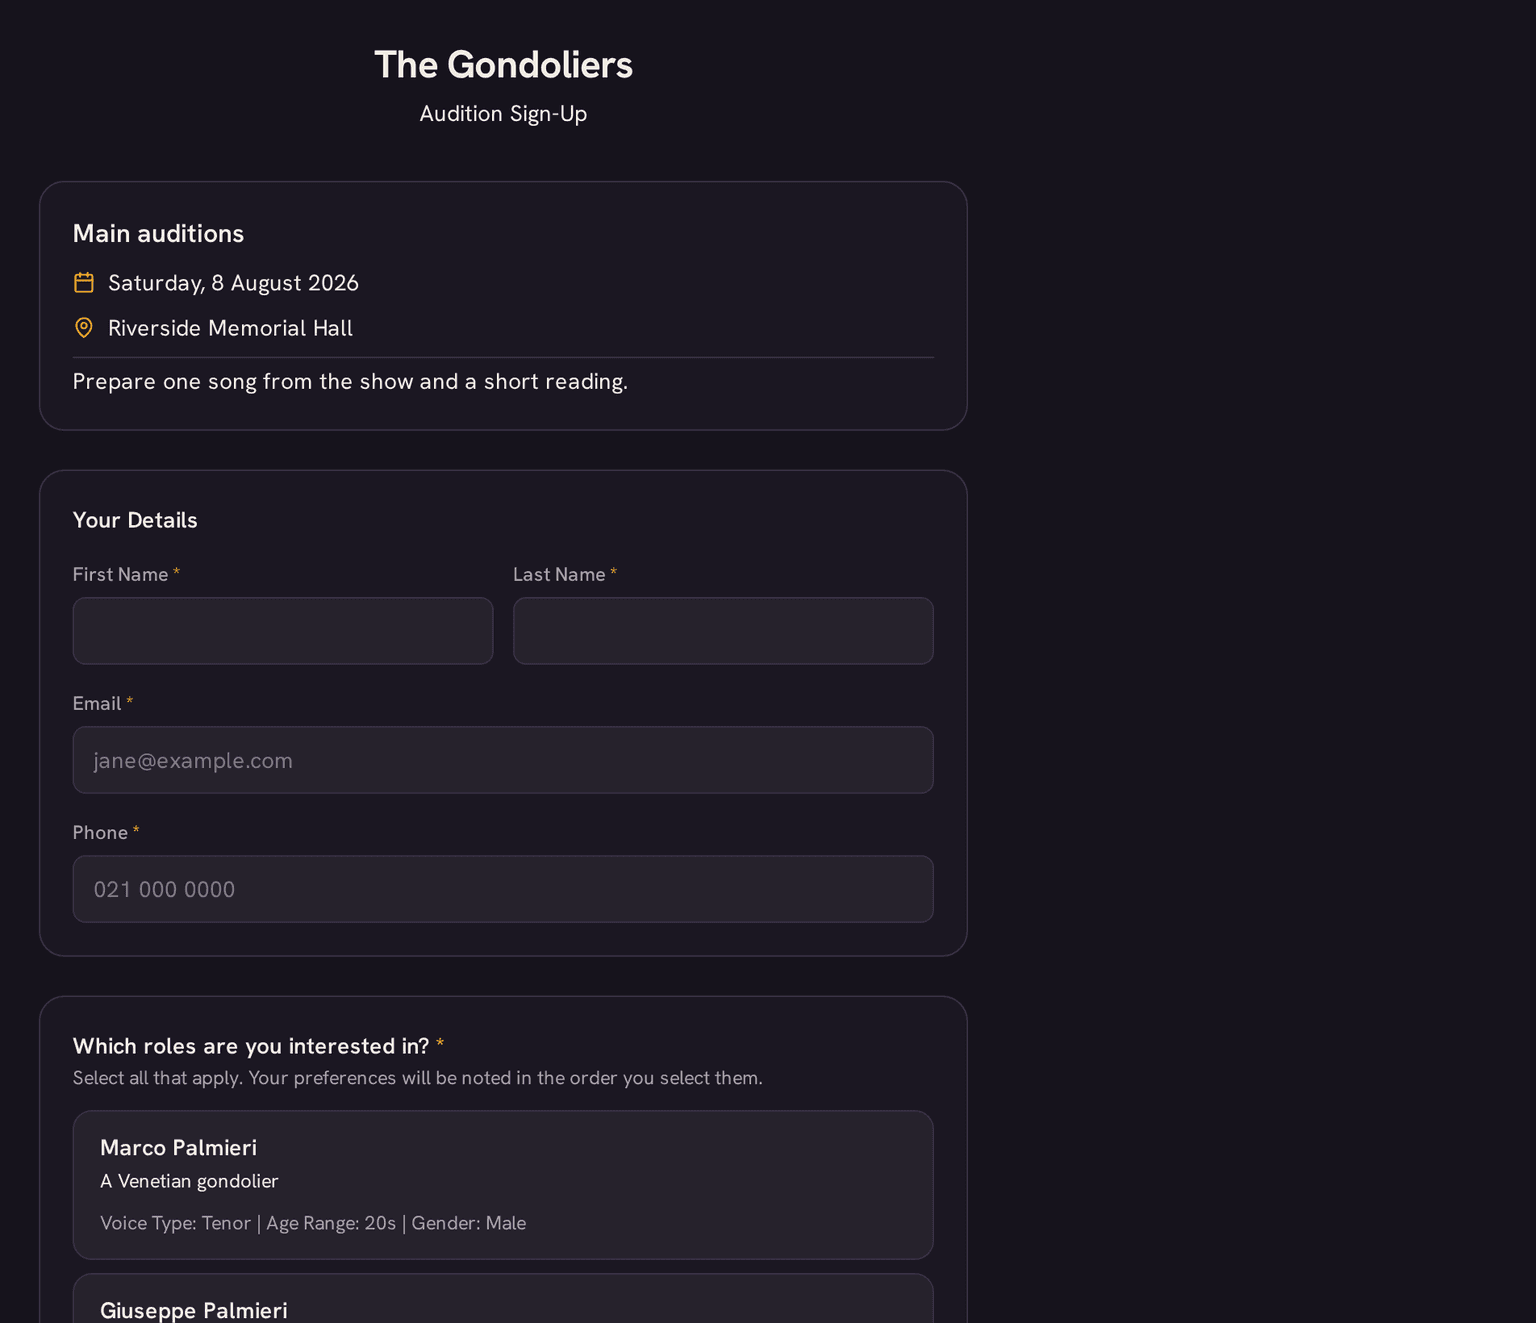
Your auditionees give their name, email and phone, pick the roles they are interested in, and choose a time slot. The page carries your session's date, location and notes, so everything they need is on one screen.
⚠ The link only accepts entries while the production is in Pre-Production. In Planning you can set everything up, but sign-ups will not open until you advance the phase on the Timeline. Advancing past Pre-Production closes them again. The same rule governs the Auditions button on your public website, so the two go live together.
Making the form your own
The Signup Form tab is also where you shape the form itself.
Name, email and phone are always shown. Four sections are optional, and you can reorder or hide each one:
- role preferences
- time slots
- the unavailability calendar
- the headshot and CV upload
You can add your own items anywhere in the form. There are three kinds:
- a tick box, such as "I have read and accept…", which you can link to a document you have uploaded — so somebody reads your audition pack or your child-safety policy and confirms before they can submit;
- a written question, answered in free text;
- a note, which displays something they need to read but not answer.
There are no dropdown or date questions. Tick box, free text and a note are the three.
How to run the door on the day
Auditions ▸ Run Sheet lists everybody who has signed up, grouped by session in slot-time order. This is your running order for the day.
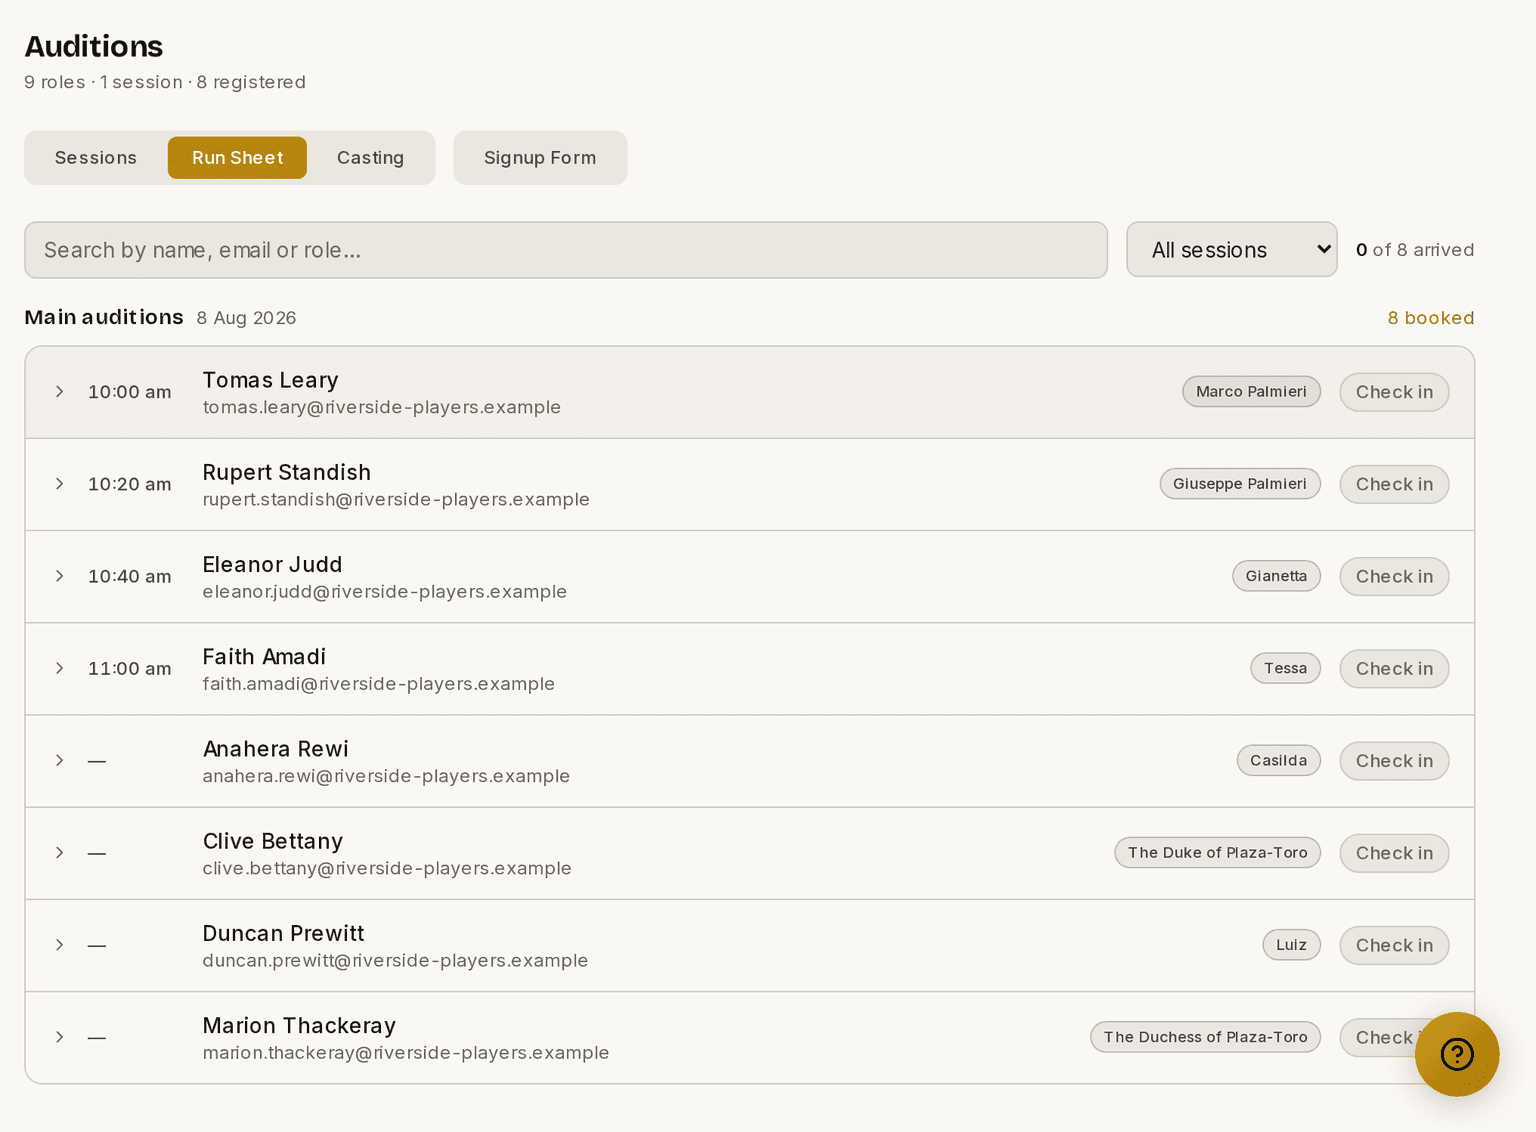
- Open Auditions ▸ Run Sheet.
- Click Check in beside somebody's name when they arrive. Click it again to undo.
- Click the arrow beside a name for more controls.
The controls behind the arrow let you edit somebody's contact details, resend their confirmation, copy or resend their booking link, or remove a spam or duplicate entry. Editing contact details is the one you will want most — it rescues somebody who mistyped their email and never got their booking link.
Auditionees manage their own booking through the link in their confirmation email. They can change their time, change their roles, or withdraw. You rarely need to touch it.
How to record casting decisions
Prompter emails everybody booked to audition a reminder the day before, with a link to change their time or withdraw. Reminders use your organisation's timezone to work out "the day before".
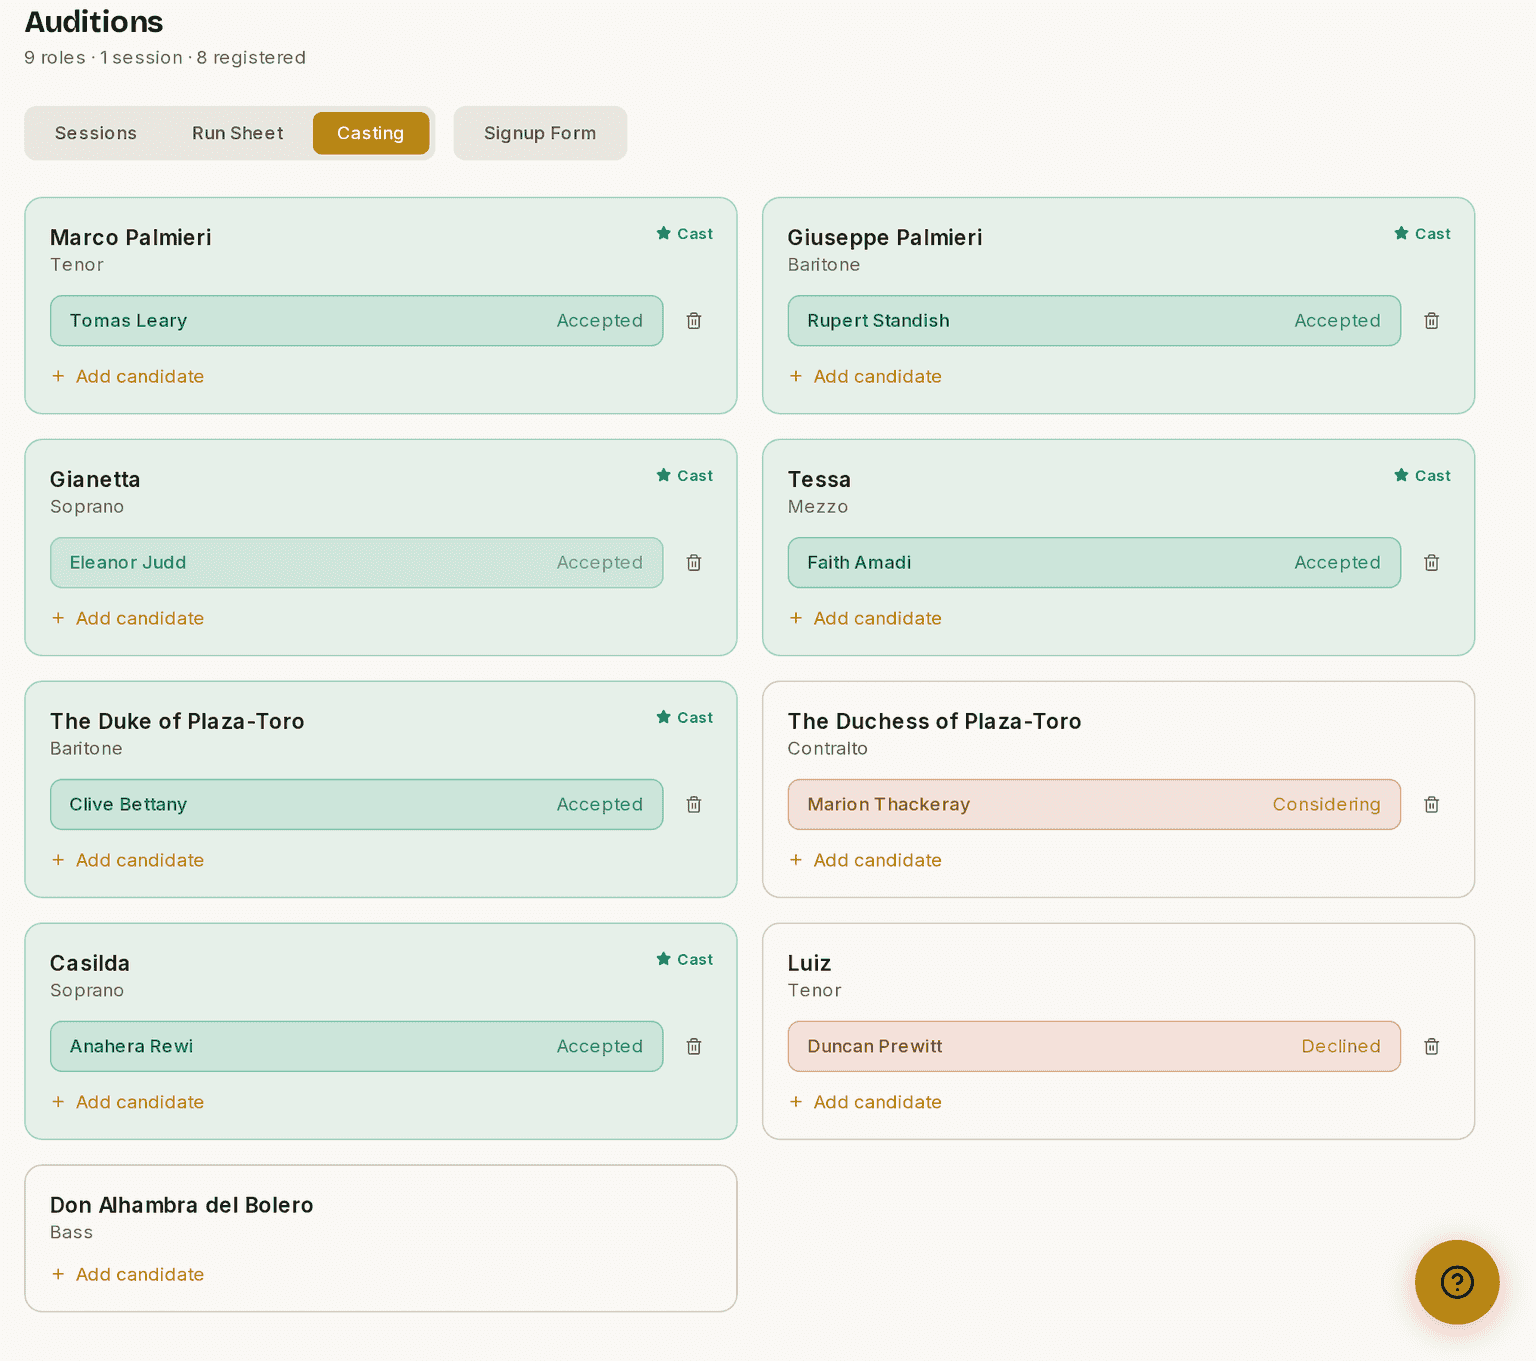
- Open Auditions ▸ Casting.
- Find the card for the role you are casting.
- Click a name on that card to open the decision box. To record somebody who did not ask for the role, click Add candidate and pick them from Auditionee.
- Choose a Status: Considering, Offered, Accepted, Declined or Withdrawn.
- Add Notes if they help you remember why.
- Click Add to save.
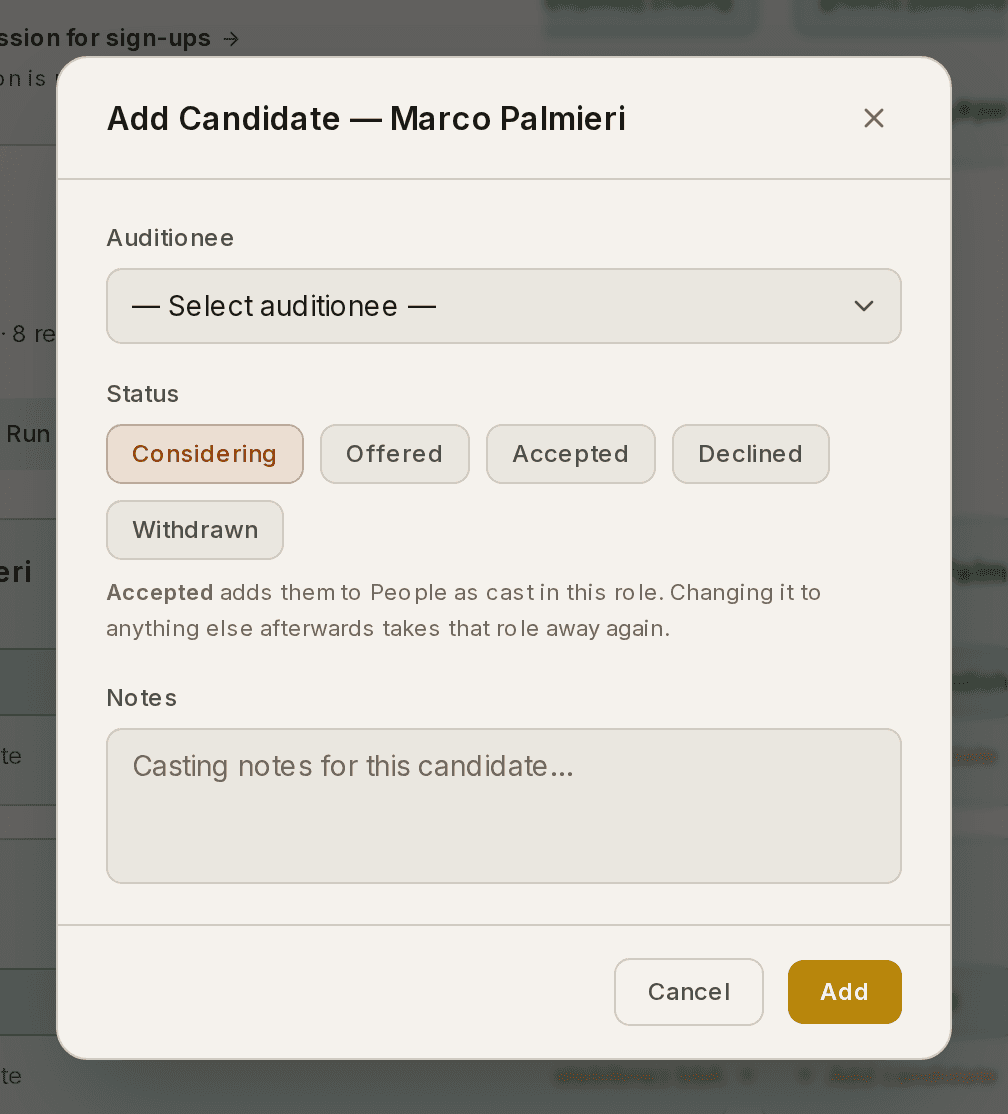
⚠ Accepted is not just a label. It adds that person to People as cast in that role. Changing the decision to anything else afterwards takes the role away again, so be deliberate. The box tells you this before you choose.
Each role card shows who asked for it. If your form collected role preferences, the people who chose that role are listed on its card in the order they ranked it — 1st, 2nd, 3rd. You do not have to go back to the Run Sheet to find out who wanted what. Nothing is recorded until you make a decision; they are shown as interested, not decided. Once somebody has a decision for a role they drop off that list, because they are in the list above it.
Add candidate covers anybody who did not ask — a walk-in, or somebody you would like to try in a part they did not pick. Its list puts the people who asked for that role at the top.
Staying in touch with people who auditioned
Your sign-up form ends with an optional, unticked box: "Keep me posted about future auditions at [your company]."
Ticking it makes no difference to the audition, and it is never required. If somebody ticks it, you may use their name and contact details to tell them when you are casting again. That is your company only. It is never shared with anyone else, and they can ask you to stop whenever they like. If they leave it unticked, their details are used for that audition and nothing else.
It is the same opt-in your ticket buyers get at checkout, and it is there for the obvious reason: the people who auditioned for you last year are exactly the people who would want to know about this year.
⚠ Anybody who signed up before 10 August 2026 was never asked, so they count as not opted in. That is not a gap we can fill afterwards. They agreed to something narrower at the time, and that stands.
What happens to their audition files when you cast somebody
While somebody is only an applicant, anything they uploaded through your sign-up form — a CV, a headshot, a song recording — lives only in Auditions. It never appears in your Documents library, because that library is open to every head of department, and an applicant's personal file is not theirs to browse.
Once you set that person to Accepted, those files join your production documents in the People category. People is manager-only, so you and your fellow managers find a cast member's headshot where you would expect it, and HODs still cannot. The file stays in Auditions as well. It is in both places, not moved out of one.
Change your mind and set them to something other than Accepted, and the file quietly leaves Documents again. Nothing is deleted either way.
Files you uploaded about an applicant — panel notes, for instance — are never affected. This covers only what the applicant sent in themselves.
These guides describe Prompter as it works today. Create a free account to try it, or see what it costs.